Car Hacking Part 1: Intro
I recently researched on Radio Signals and how they are implemented in modern cars and keyfobs algorithms. This Blogpost is the first of a series in which I’ll explain the path I followed, from understanding the basic Reply attack to the most advanced Rolljam, using different hardware and methodologies.
I won’t go in depth on certain topics and I will assume that the reader has a general background in basic signals theory and is comfortable with terms like radio frequencies, gain, filters…
Algorithms and Frequencies Car Opening mechanisms (keyfobs, if you want) work at default frequencies, depending on the country they come from and the brand: 315MHz, 433.92MHz or 868MHz. This allow us to easily find out the exact frequency of the keyfob operates at. Also, if we exclude the opening mechanisms implementing both Radio Signals and Bluetooth (i.e. Tesla), there are 2 main algorithms implemented in modern cars:
- Single Code: a single string of code is sent from the keyfob to the car. This is the exact same code every time the owner of the car clicks the button on the keyfob. This implementation is obviously lacking of security since whoever intercepts, clones and repeats the signal sent from the keyfob is basically able to open the car.
__ ______ /o \_____ ABC /|_||_\`.__ \__/-="="` ---------------> ( _ _ _\ =`-(_)--(_)-'
- Rolling Code: this algorithm is a little more secure than the Single Code, since it’s based on an iteration through a long array of single-use codes. This avoids a string of code to be used twice or more times, protecting the car from simple replay attacks.
ABC
--------------->
DEF
__ ---------------> ______
/o \_____ GHI /|_||_\`.__
\__/-="="` ---------------> ( _ _ _\
=`-(_)--(_)-'
Tools Used There are many interesting tools, both hardware and software, that can be used for such purpose. I tried the majority of them, to have a better understanding of which is the best.
Hardware:
- Yard Stick One: Cheapest and quite versatile half-duplex radio dongle able to receive or transmit signals below 1GHz. Perfect to jam the signal (we’ll talk later about it), honestly I did not really like the interface, but it did its job.
- HackRF: the most famous SDR on the market, half-duplex, range from 1MHz to 6GHz (quite impressive tbh). Different ways for operating it. Not sure what to say about this one, it’s the standard.
- BladeRF: expensive, but probably the best interface around. Full-duplex, 2 RX and 2 TX Antennas with 2x2 MIMO, 47MHz to 6GHz… I mean, it’s definitely my favourite toy.
Software:
- GNU Radio: block-based tool used to play with radio signals, not easy at first impact, not really something a hacker would put hands on without knowing signals theory. With time, it became my best friend.
- CLIs: Each hardware interface has it’s own CLI, unfortunately quite messy and not always working. The HackRF one works fine, the BladeRF one is kinda messy, a little too much, mostly when dealing with full-duplex stuff, sending and receiving simultaneously.
- Python Libraries: Really handy, I liked it. I only used the HackRF one and works fine, I imagine the one from Nuand for the BladeRF might have the same issues as the CLI.
- GQRX and others: there are several other tools such as GQRX or URH (Universal Radio Hacker) that allows you to analyse the radio signals. These are great to understand what is going on at a low level, printing the actual signal and trying to dunp the data transmitted. As you can imagine, it’s quite tricky to find out the modulation and the structure of the data the signal is sending, but still it is quite interesting to check it out.
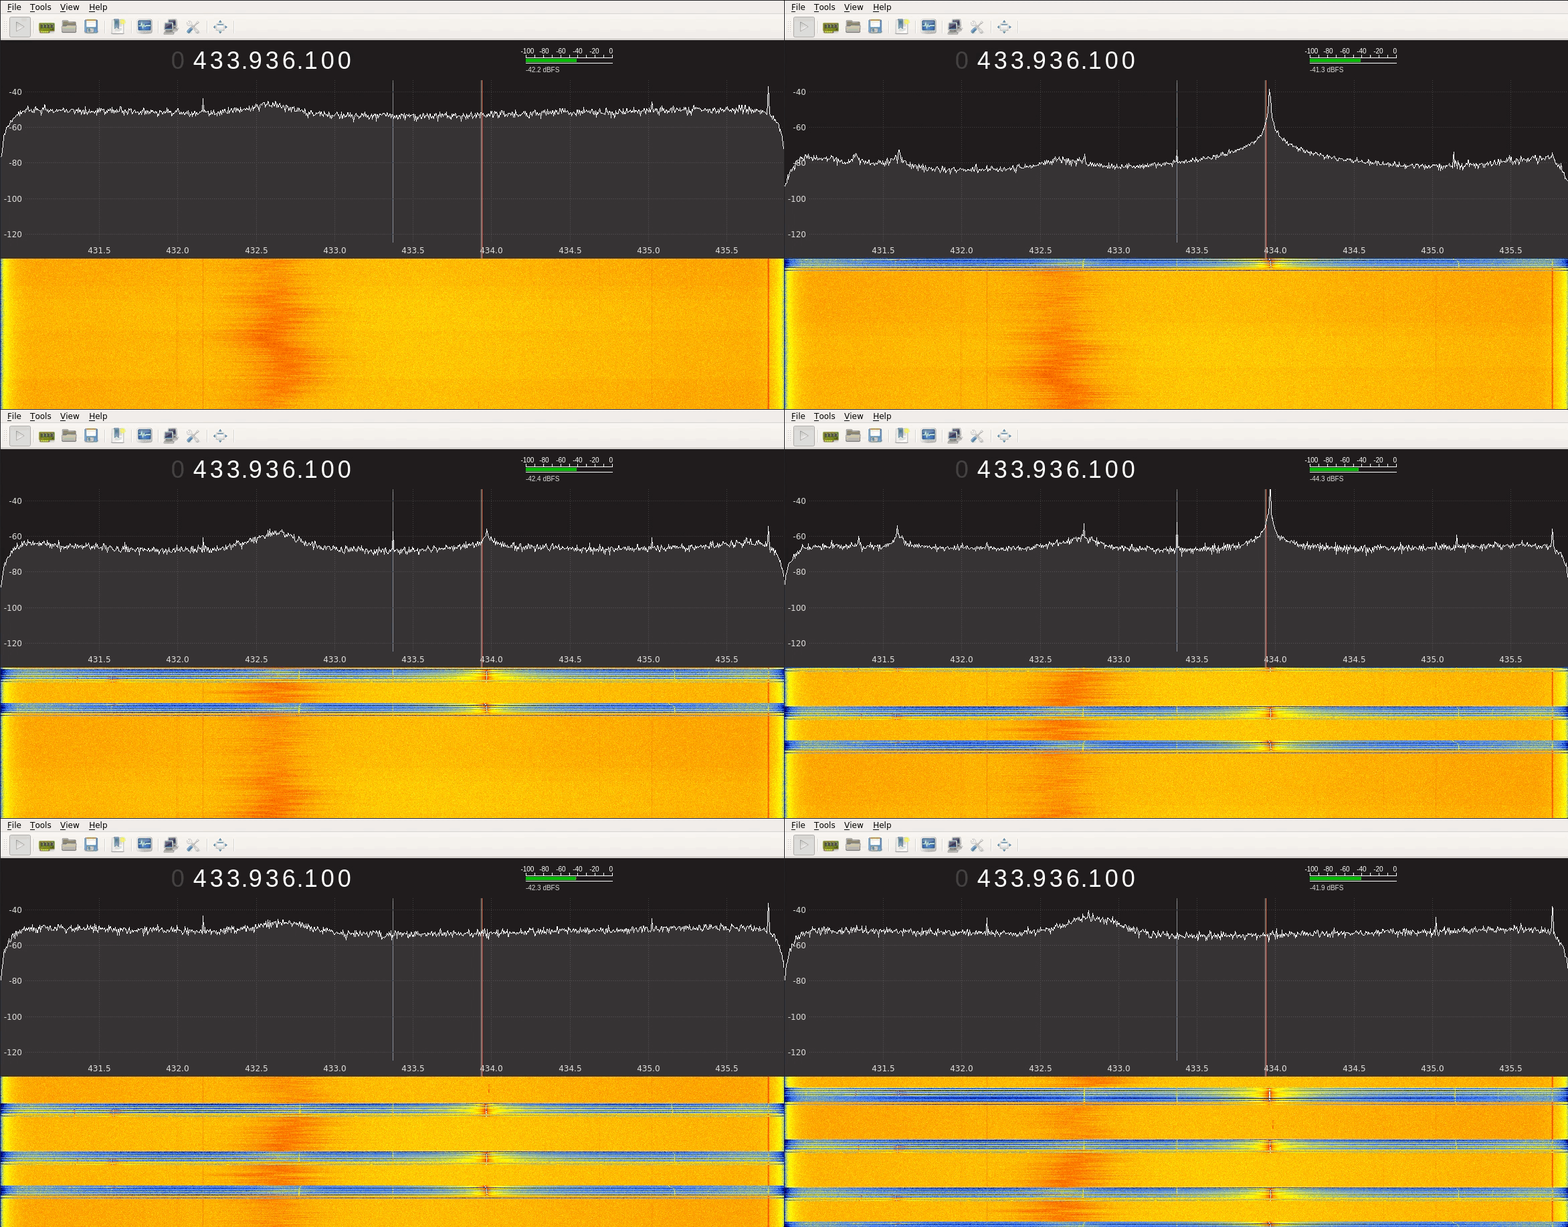
Analysing the Signal Let’s now try to plot the signal that a keyfob is sending using GQRX and a BladeRF:

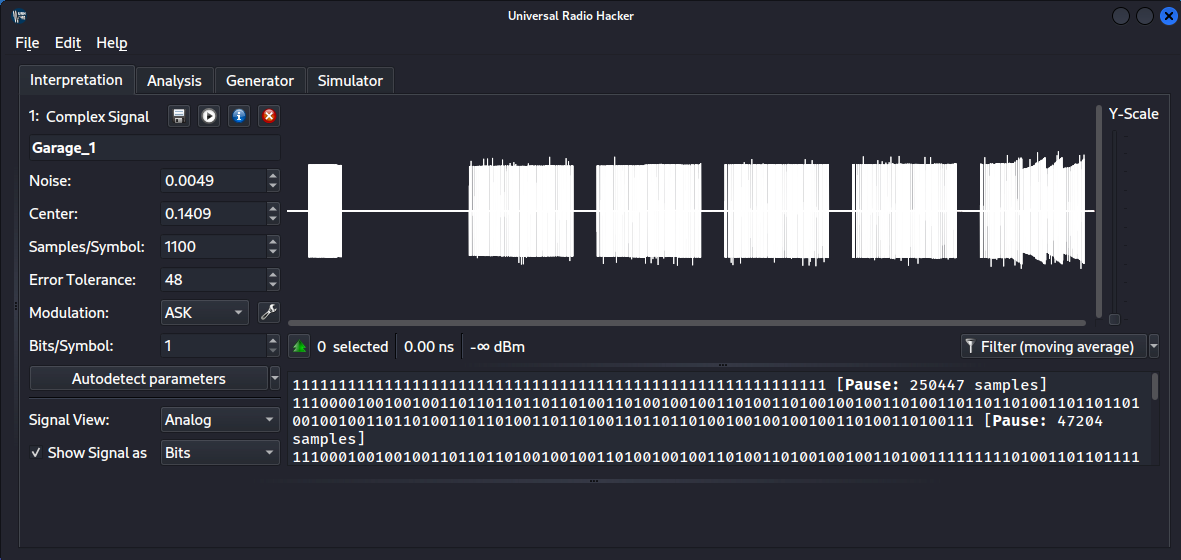
As we can see from the figure above, the interface is receiving the signal and printing it around 433.92MHz, since the keyfob works at that frequency (there always will be a some offset/noise when receiving the signal, so it won’t be at exactly 433.92MHz, but close enough). We can clearly see the pick every time I click the button on the keyfob. This tool allows us to see the frequency of the signal, but let’s get deeper and let’s use URH to actually check the data the signal carries:

In this case, URH prints the actual waveform of the signal, trying to automatically detect the modulation and other parameters used and dumping the relative data transmitted.
With this basic understanding, we can now pass onto analysing the various attack against these mechanisms, starting from the easiest Replay Attack.